
Custom Vanity Cabinet
After getting most of the way done with my concrete counter top, I decided I needed a custom vanity to go along with it. Using Erika's Pinterest account to look for a bunch of ideas, I finally merged everything I liked into this. Yes.. I used her Pinterest account because there's a bunch of good stuff on there and I refuse to get my own account. (Call it a macho thing if you want..)

 |
| Using Google SketchUp, again, I created a model of exactly what I want. I'm pretty sure this took a lot less time than the counter but this is now the third thing I've modeled using SketchUp. It's really nice because I've got all of the measurements of every piece of wood and can print it out from different angles. |
 |
| Even though I had all of the accurate measurements on my model printout, it didn't keep me from making the fake drawer face an inch too short.. All said and done I had to remake the fake drawer face and both doors. The doors weren't too small but they were warped a little more than I wanted to deal with. Apparently clamping things too tight is a bad thing.. My second set of doors came out nice and straight. |
 |
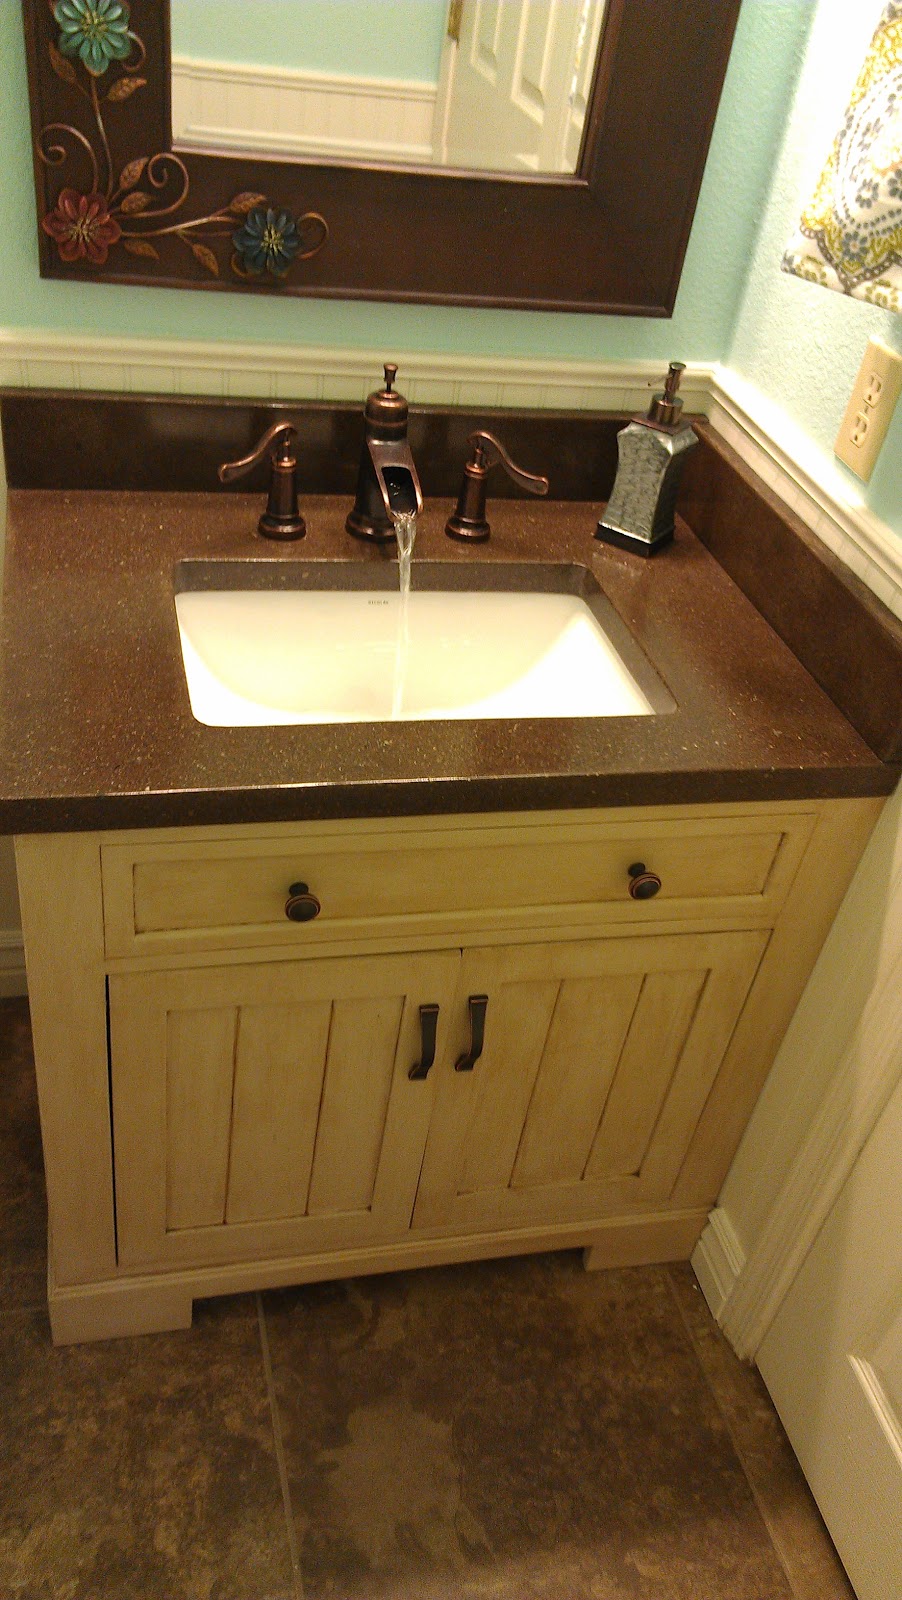
| After painting it a Mushroom Cream and putting a Chocolate Glaze on it, we finished installing the hardware. The main thing I learned here was to get the best paint and brush you can to minimize brush strokes. Or get a decent paint sprayer, not one of those cheapo ones that are all plastic. I didn't get cheap paint but my brush wasn't the best. I ended up with a bunch of brush strokes that were nearly invisible to the naked eye but it made the glaze turn out quite differently than I expected. Overall it looks really good and you can't tell that the glaze wasn't what I originally wanted so I'm happy. |
 |
Here's a picture of my completed bathroom with the custom cabinet and home-made concrete counter. I wish I would have taken more pictures of the bathroom before during and after the change because then I could describe it step by step. This bathroom has undertaken a major transformation. Over the past few months I've redone or added the tile, wainscoting, paint, molding, lighting, mirror, hardware and vanity. The only original thing in this bathroom is the toilet and the door. Overall I think we spent less than $500 on this bathroom and most of it is still the dang faucet.
Lessons Learned
|