
How To Make Breadboard Ends with Drawbored Joinery

Check out the Video!Please Subscribe!
In this article, I'm going to describe my process of making breadboard ends with drawbored joinery. All of the footage from the video and pictures used in this article came from my recent Farmhouse Table project. I got quite a few requests for a more detailed article/video on the breadboard ends so here it is but if you haven't seen that build, you should check it out!
Why Breadboard Ends & What's Drawbored Joinery
Breadboard End with Drawboard Joinery
As far as I can tell, there are two primary reasons to use breadboard ends. The first being that they fancy up a table and hide the sad-looking end grain. The second, which is probably the more important one, is they help keep the table flat while allowing for seasonal wood movement.One of the key aspects to making a functional breadboard end is including drawbored joinery. This type of joinery relies on a dowel to hold everything in place between the mortise and tenons but the dowel hole in the tenon is offset just a tiny bit forcing the dowel to go around which draws the breadboard in toward the center of the table.
Sizes, Measurements & Layout
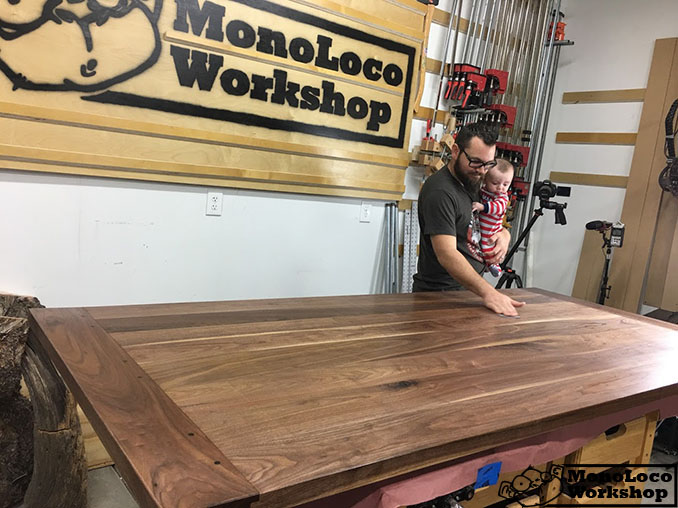
Breadboard End with Drawboard Joinery with finigh and baby chloe
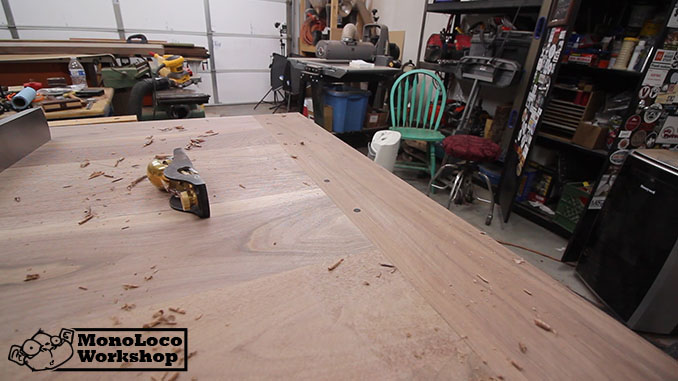
I've done research to figure out what the guidelines for sizes of breadboard ends and tenons are and it seems that every place I go has slightly different rules of thumb. Some places say they are generally 2-3-inches wide and depending on who you ask, the longer the tenon the better and others prefer short tenons. So I'll just stick with what I think looks good and what sounds reasonably functional.The dimensions of my table top was 40-inches X 90-inches X 1.5-inches and since it was a fairly beefy table top, I didn't want little stubby breadboard ends. I naturally went with the biggest I could get out of one board at 5-inches wide. When making tenons, I like to stay around 1/3rd of the thickness so 0.5-inches thick it was. It also didn't hurt that I had a 0.5-inch diameter spiral up-cut bit that would permit 2-inches of cutting capacity. That 2-inches of cutting capacity ended up as my overall depth of the mortises but technically my tenons were only 1.5-inches long because I left a 0.5-inch tongue to help a little more with keeping the table flat.When it comes to the tenon width, three tenons sounded about right so I took the 40-inch width, subtracted a couple of inches from each side and divided the remainder by 5 giving me 3 equal sized tenons and 2 equal sized spaces between them. ((40-2-2))/5=7.2") I did end up making the mortises just a little wider to allow for wood movement but didn't end up mentioning or really showing that in the video.
Dimensions
Table - 40" x 90" x 1.5"
Breadboard End - 40" x 5" x 1.5"
Tongue - 40" x 0.5" x 0.5"
Tenons - (3) 1.5" x ~7" x 0.5" (1.5" past the tongue)
Cutting the Mortises & Groves
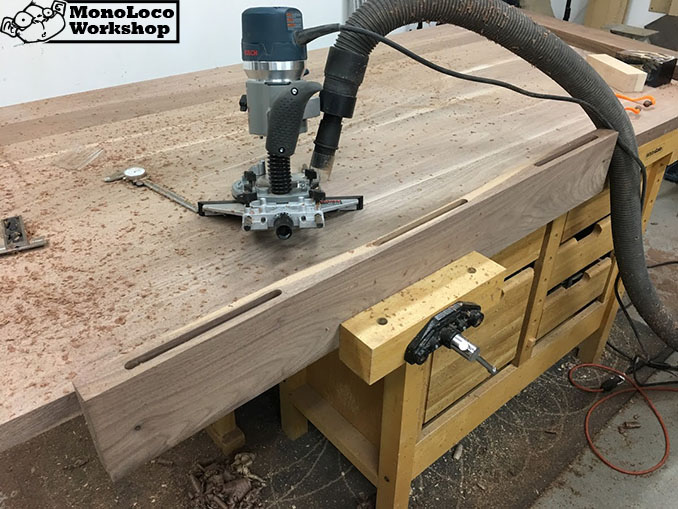
cutting the mortises on a breadboard end
When cutting the mortises, I use a good router bit the same size as the mortise or slightly undersized and plunge all the way down on both ends of the mortise. For a 0.5-inch wide and 2-inch deep mortise, you'll need a fairly heavy plunge router with either an edge attachment or a center finding jig. Then I'll take light passes to remove the rest of the material in between. Using a router to cut mortises leaves round edge and you can either leave them round and also round over the tenons or square them off with a chisel. I like to square them off. (You could also use a drill press, chisel and mallet or mortiser.)After cutting and cleaning up all of the mortises in the breadboard end, I'll use the same router and bit in my router table to create the tongue for the tongue and groove. (Now that I type this, I wonder why I didn't just use the router and the edge guide other than thinking the router table might help me not mess it up... oh well.)
Cutting the Tongue and Tenons

Breadboard End with Drawboard Joinery tongue and tenons
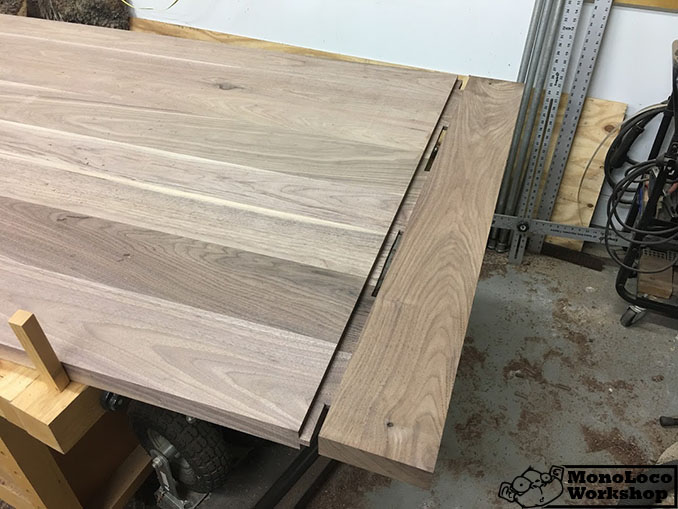
Breadboard End with Drawboard Joinery dry fit
At this point you should already have the mortises/grooves done so the tongue/tenons will need to be made to fit so I'm going to stop with the measurements.I like to use a marking gauge and marking knife when possible to both increase accuracy and to sever the grain helping reduce tear out. So first thing is to mark the length of the tongue+tenon on the end of the table top with a marking gauge and then remove roughly 1/3 (making it fit) from both the top and bottom of the table effectively forming what will be both the tongue and tenons. Then using a marking gauge and knife, mark the end of the tongue and each tenon and cut them out using a hand saw and coping saw. You'll then have to clean up anything not perfectly straight with a chisel and/or hand plane.Now all tongues, grooves, mortises and tenons have been cut and hopefully fit snugly but not so snugly they won't come apart.
Installing the Drawbored Breadboard Ends
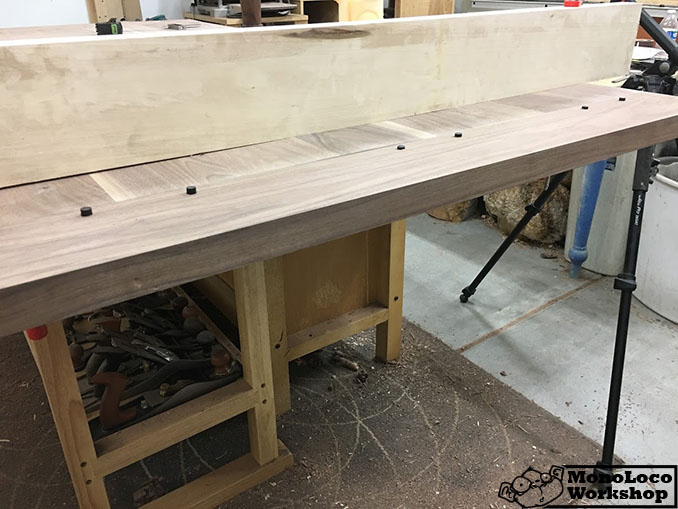
Breadboard End with Drawboard Joinery

Breadboard End with Drawboard Joinery cleaning up dowels

Breadboard End with Drawboard Joinery with finish
Time for some drawbored action to get these breadboard ends attached. When deciding on how many dowels to use in each tenon it's kind of up to you but on something this large, I would say you either need three larger dowels (1 for each tenon) or 6 smaller dowels like I did (2 for each tenon).Mark the location of each dowel and drill completely through the breadboard end with it off of the table top. I put my dowels 1-inch from the edge of the table splitting the distance to the end of the tenons. Now dry fit the breadboard end onto the table and mark the location of the dowel hole on the tenon. I like to use a forstner bit the same size as the tenon as it should ensure I get a perfectly centered mark for each dowel. To get the drawbored effect, drill the hole in the tenon not where it was marked but 1/32 to 1/16 of an inch offset towards the center of the table. This will force the dowel to go around the tenon drawing the breadboard end in tight.The dowel holes in the outside tenons need to be elongated along the width of the table to allow for wood movement. I usually just tilt my drill bit back and forth and use a little file to finish it off. You'll also need to make sure the dowels are sharpened to a slight point on the side that gets hammered in which will help it be guided around the tenon without breaking anything.Now just apply some glue on the CENTER TENON ONLY, re-attach the breadboard end and hammer in all of the dowels. You can apply a little dab of glue on the top of outside dowels to help ensure they don't ever come out but you'll need to be fairly stingy to ensure it doesn't seep down into the joint. Clean up the excess from the dowels using a flush cut saw, chisel and sandpaper and you should have successfully finished some breadboard ends!