
All in One Cat Box
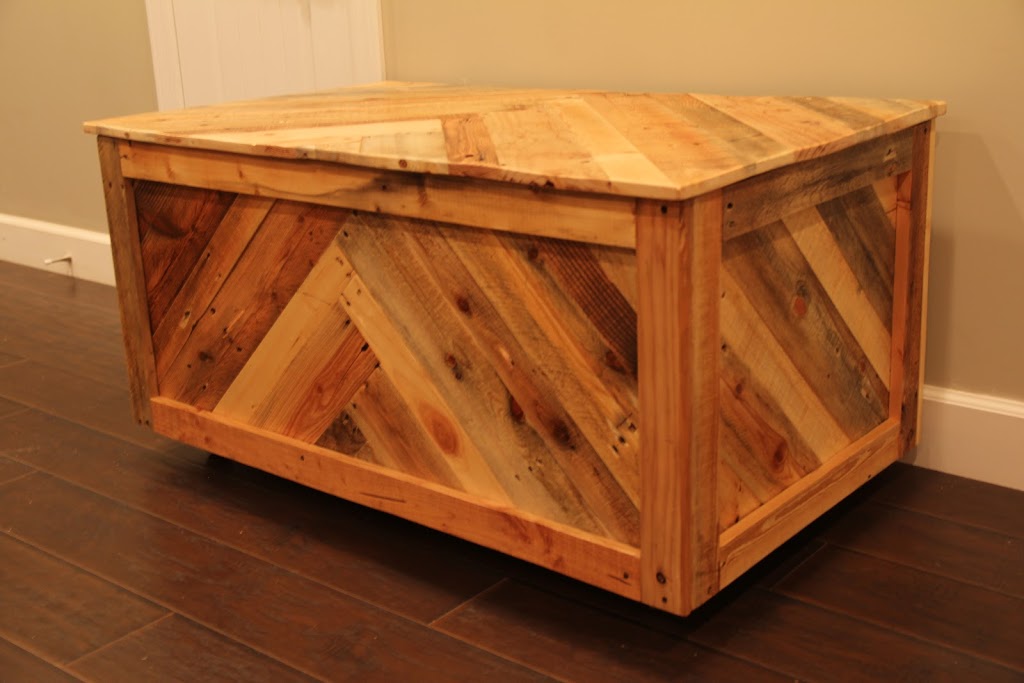
We've had one of those enclosed kitty litter boxes for the longest time and it was... ok. It did it's job but the dogs were always getting in it, kitty litter would get everywhere and I was the only one that could empty it. The bottom separated so non-clumped litter would sift through the bottom and allow you to dump the rest. I've had a fancier litter box on the list for years and finally got around to it. I was going to fancy it up a bit with walnut and mahogany but had a pile of pallet wood and wanted to try out a herringbone pattern.
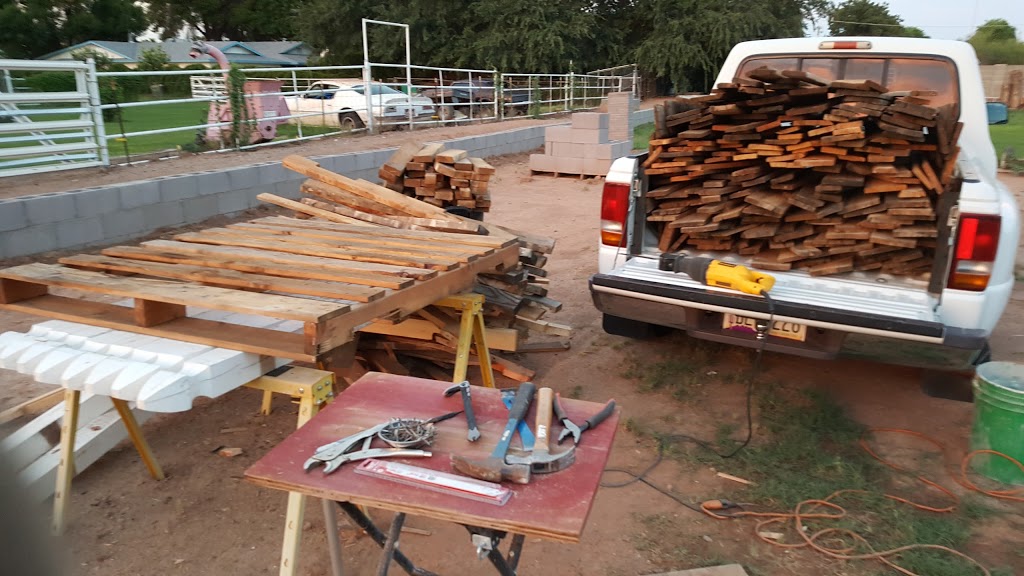

Over the course of about 6 months I've accumulated quite a stack of pallets between people giving them to me and getting loads of cinder block for my wall. Using a reciprocating saw, it took me over 5 hours to disassemble everything I had. I started by putting them in my truck knowing I was going to use them soon. I never guessed it would completely fill it up and quickly regretted that decision. I ended up moving it all to my make shift work table since I needed to drive to work a couple of days later and didn't want to drag a truck load of pallet wood around.

After taking apart the pallets, I removed any nails that I could find. I planned on running each plank through my jointer and table saw and really didn't want to mess up any blades. I quickly gave in and purchased a metal detector and I'm glad I did. I found some weirdly placed nails in a couple of boards that would have really messed stuff up.
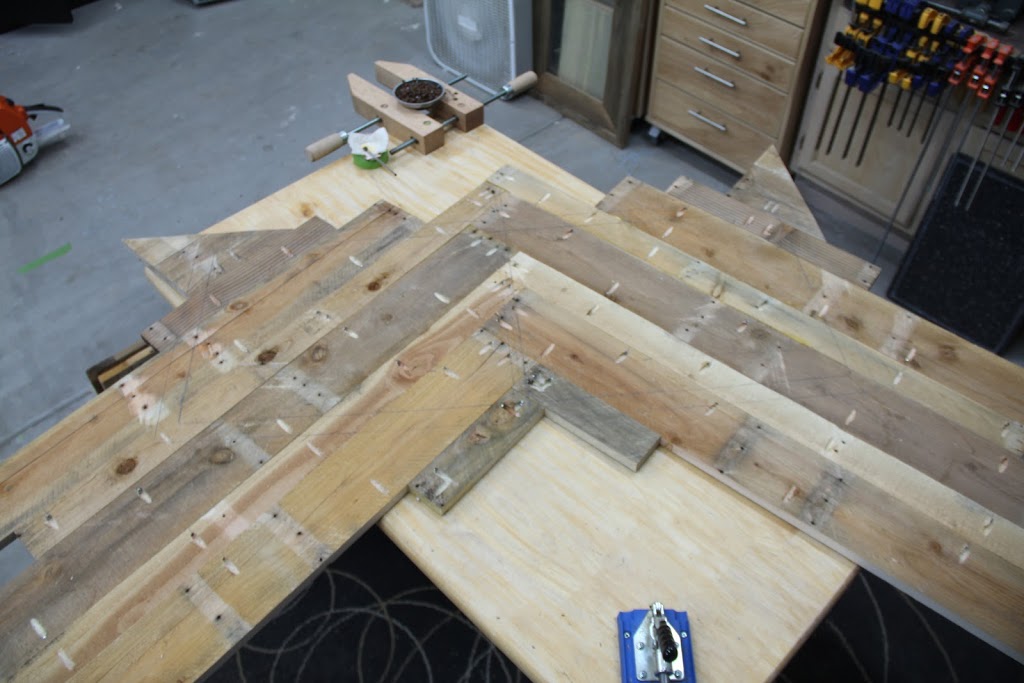
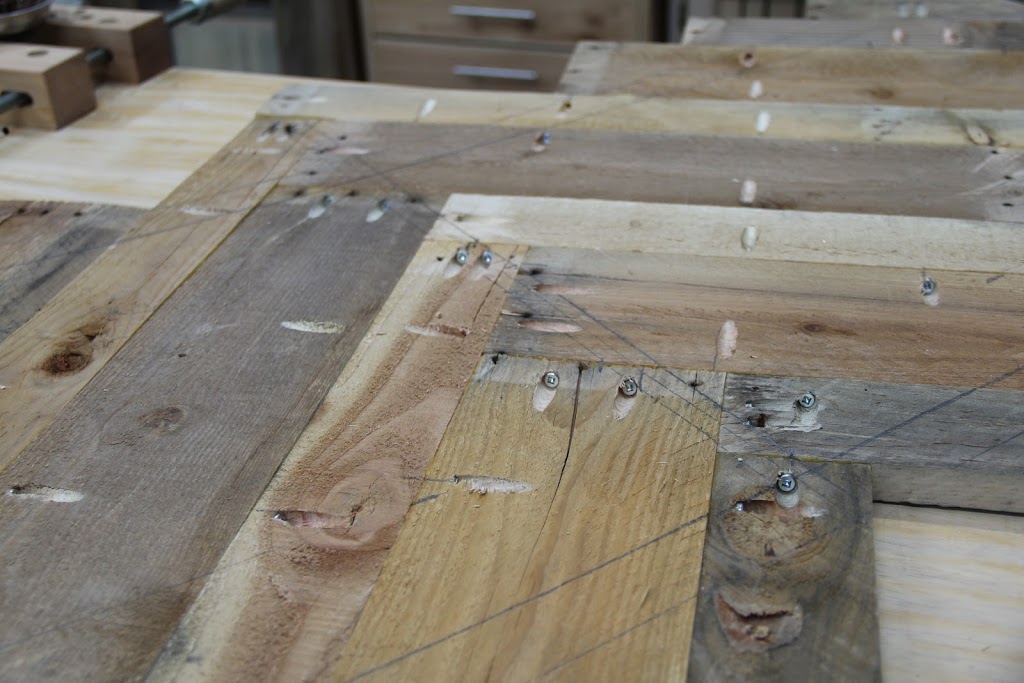
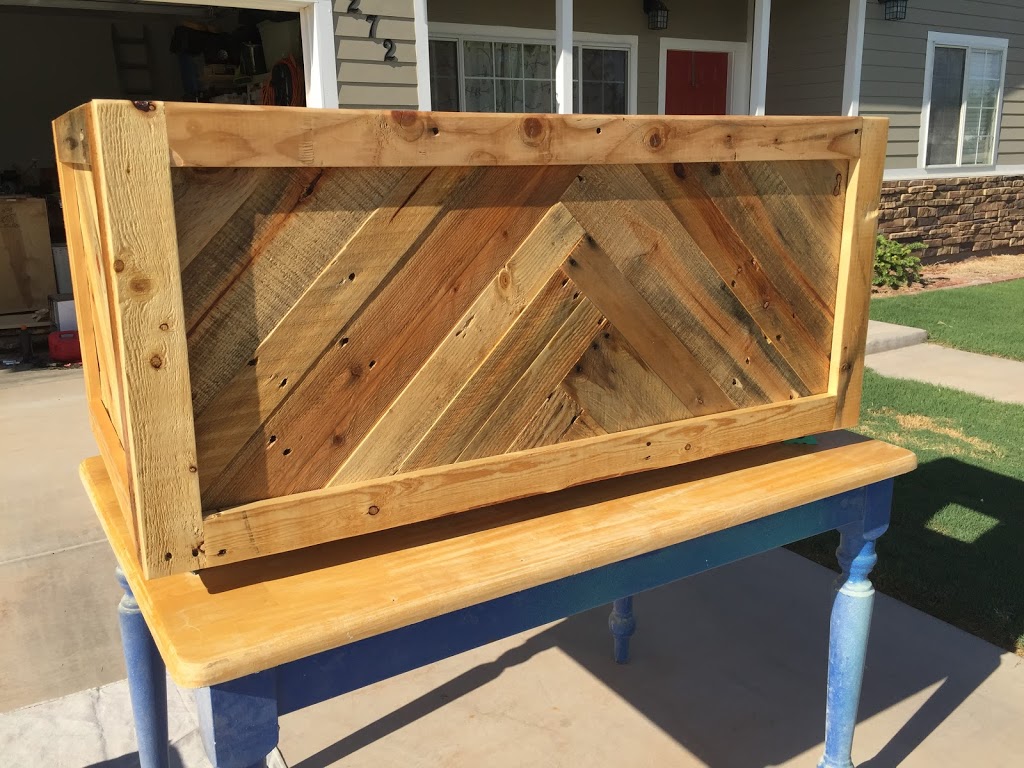
After getting both long sides and one end nice and square I started in with the pocket holes. I'm not a giant pocket hole guy and have probably only used it a few times since purchasing it a couple of years ago but this project required over 300 pocket holes! To make the panels of each frame I put two pocket holes in the end of each plank and then alternated 3 or 4 down each side to hook into the next plank. I applied glue and screwed each joint together one at a time. The first panel I used entire planks but the last 4 I cut each plank more or less to size to save on wood.


Each panel had a frame of about 2.5 inches that it got screwed to. I created the frame first and then traced out the inside of the frame onto the panel and then cut it oversize by about an inch on all sides.
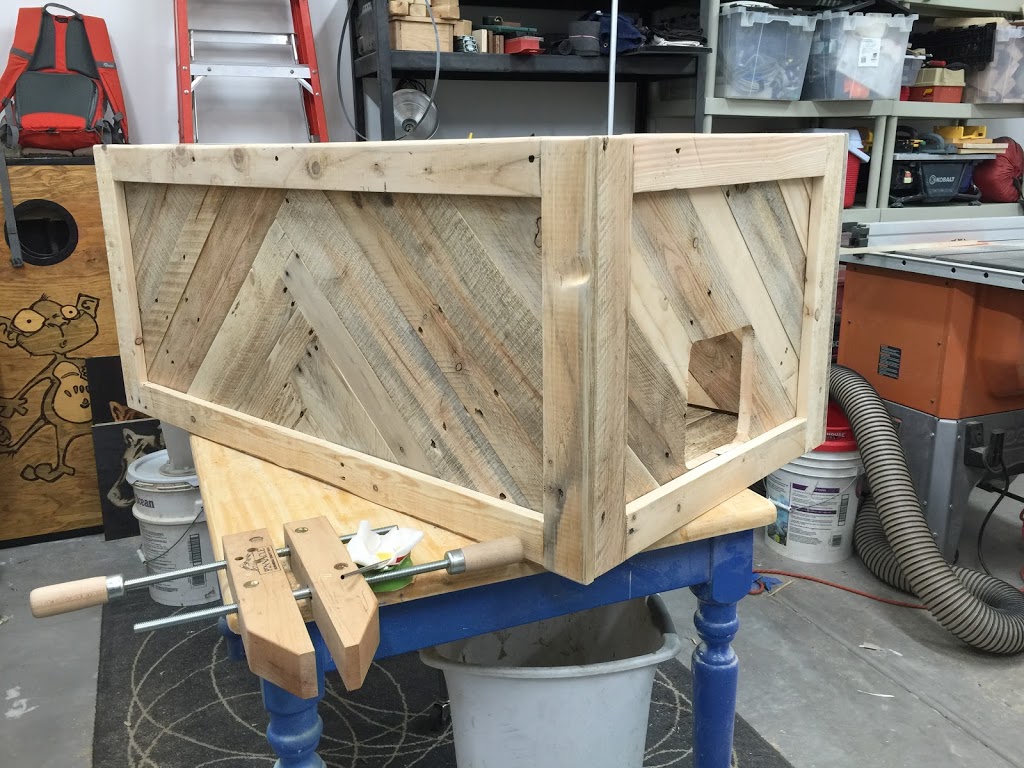
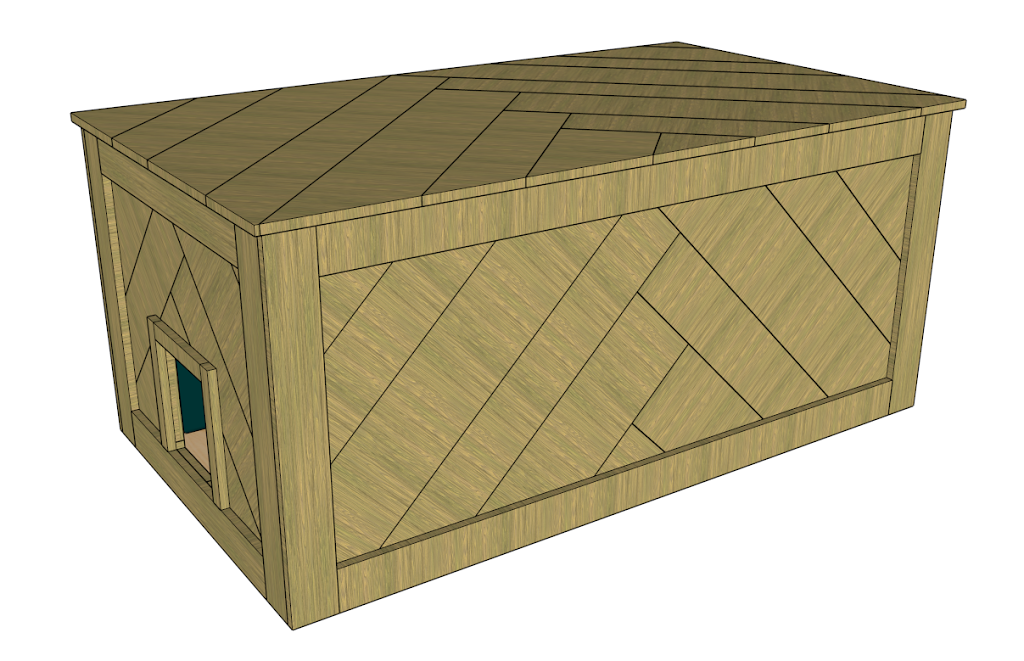
Before assembling the four sides, I cut a hole in one end so my cats could get in. Looking around at fully enclosed cat boxes I saw that many of them were around 7 inches square so that's how bit I made mine. I have two cats, one which is large and the other is fairly small. 7 inches turned out perfect. I then of course used more pocket holes and glue to assemble the four sides together.
The bottom was assembled almost the same way as the panels. The biggest difference was that instead of building the whole thing and then attaching it to the frame, I put each plank on one at a time. Everything was glued and screwed to the existing box helping tie it all together.

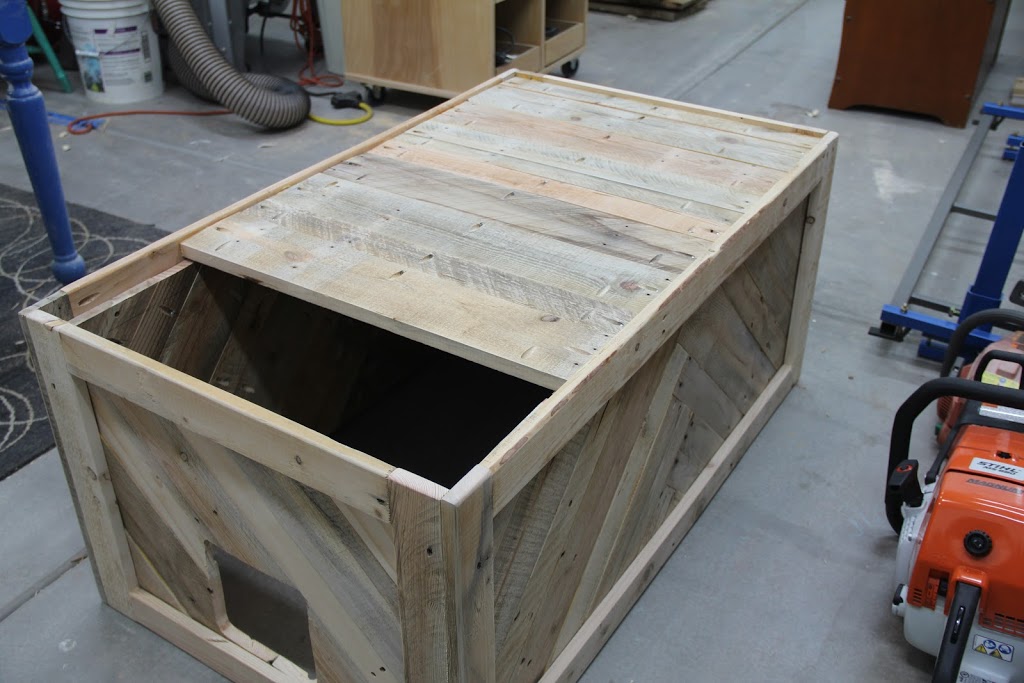
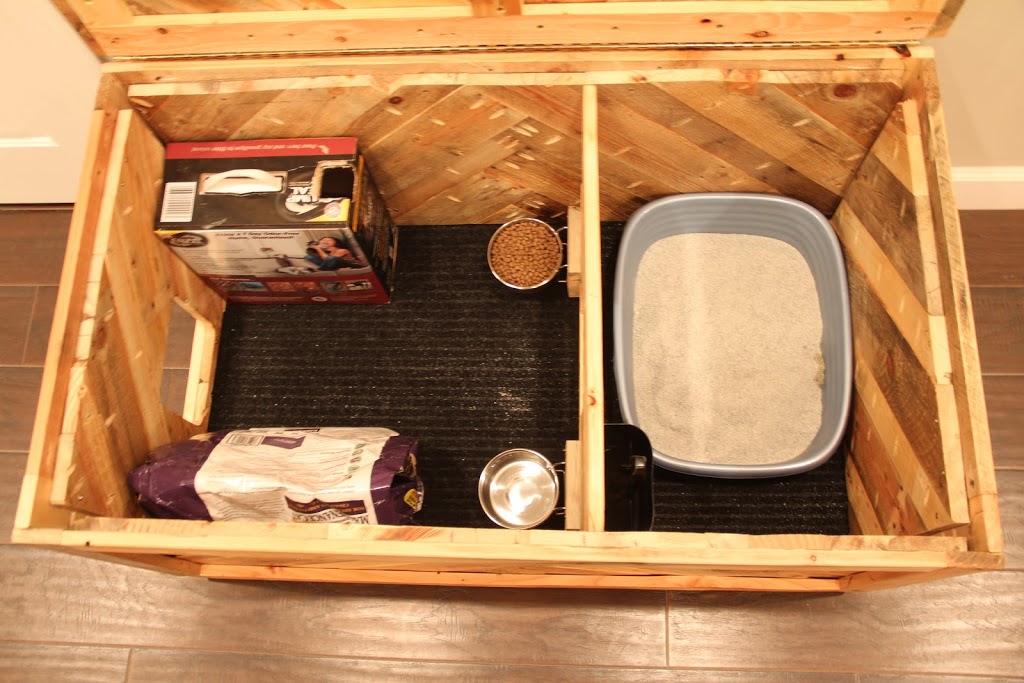
I wanted some separation between the kitty litter and the food, water and other cat supplies so I built a divider and put in a same sized hole as the end of the box. Now I had a section just large enough for a standard kitty litter box and scooper.
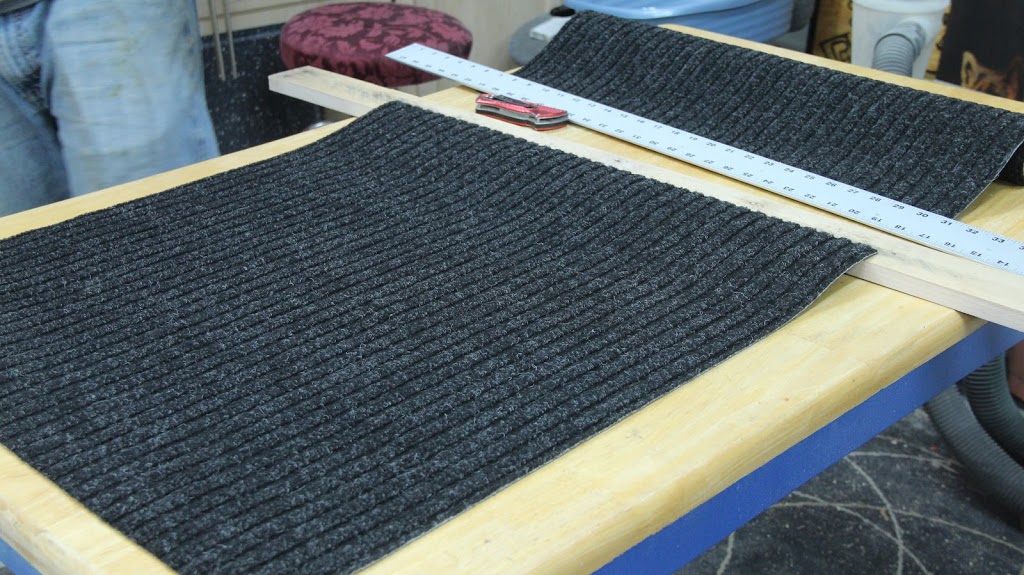
To help keep the kitty litter from leaving the box I wanted to install some carpet. I picked up something basic and cheap at the local big box store and cut it down to size to fit in both sections of the box.
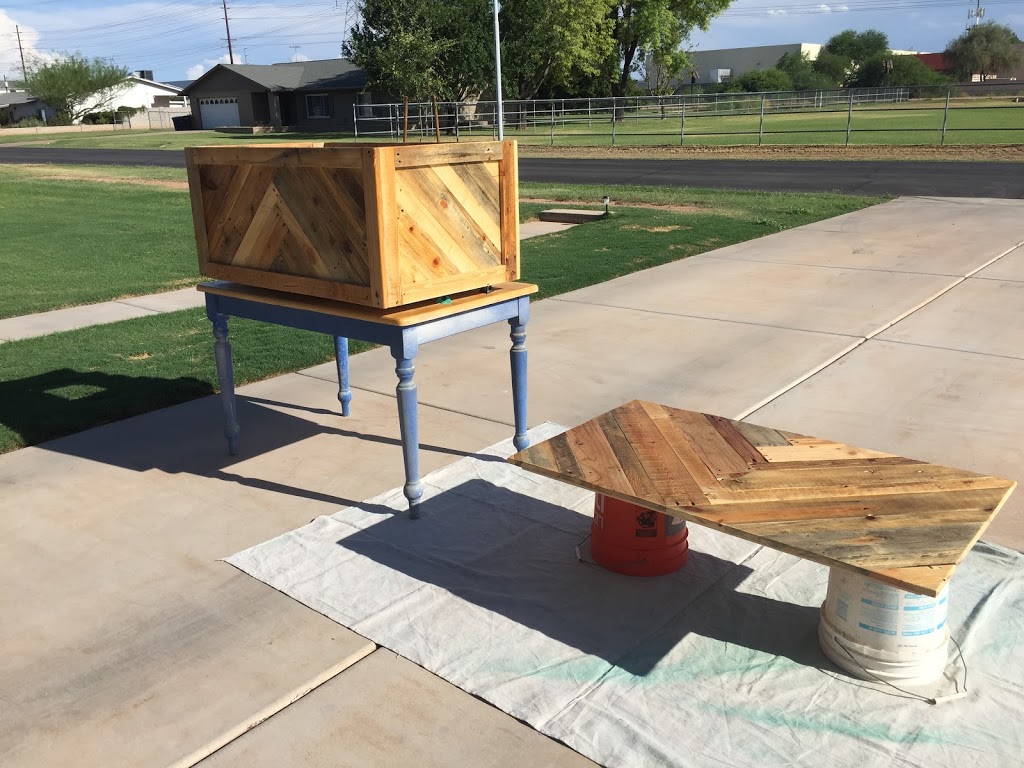

I'm done spraying stuff in my garage so I moved everything out into the driveway, thinned out some wipe on shellac and sprayed away.
A few of the reasons I wanted to use shellac were:
- It didn't have a temperature range on the can and it was probably over 105° that day.
- Polyurethane's high temperature is something like 90° which would mean I would have to wait until after dark...
- Shellac drys really fast which means I would be able to use it later that day and it wouldn't stink nearly as bad as something oil based.
- Shellac is waterproof which is probably a good idea where you have a water bowl and you might want to wash out every now and then.
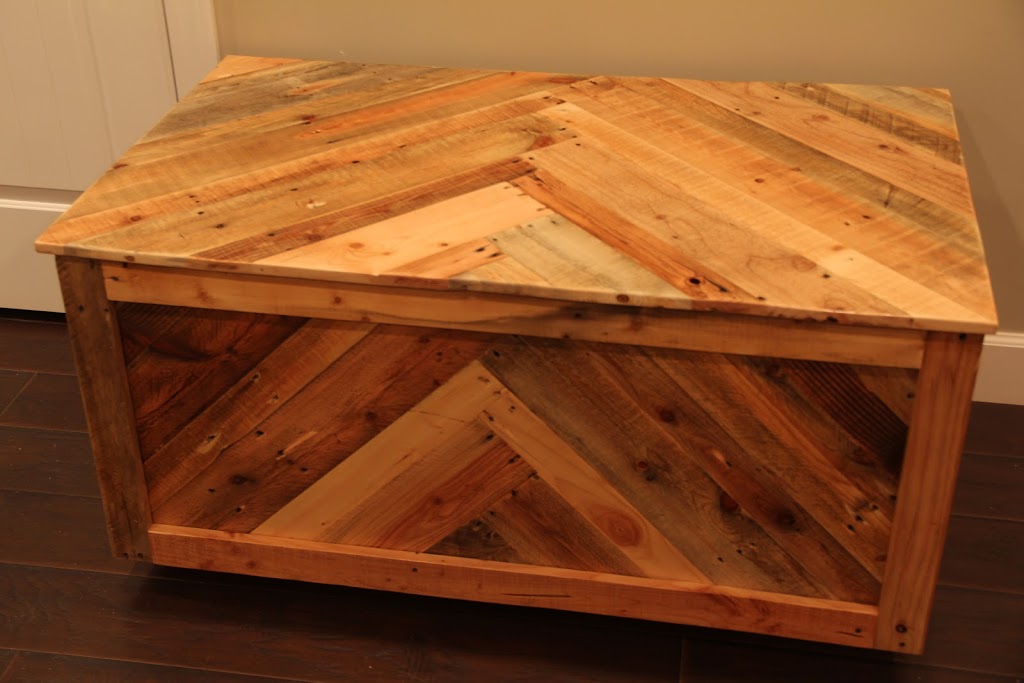
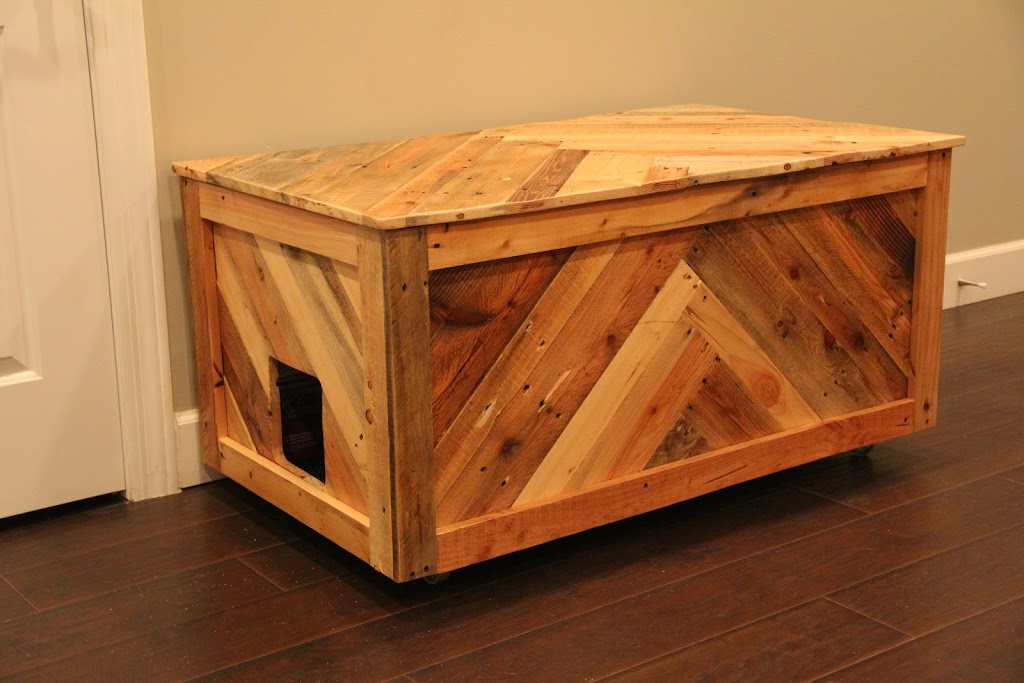

After installing some small 2.5-inch casters on the bottom, I made my wife help me move it inside. Before I even got anything put in the box my cats were checking it out. It didn't take long before they completely abandoned their other food, water and litter box for this new one. I was a little worried about them not eating since the food/water is literally right on the other side of their litter box but so far so good. If I end up having problems with them eating I can simply move their food near the exit.
Lessons Learned
- Get a metal detector! I picked up a Zircon MetalliScanner for just over $20. This really saved my butt since without it I would have at least messed up my jointer blades.
- I need to find some better carpet to help keep the litter inside. I didn't think it would make it out since the litter box is in the back but we also changed kitty litter to one that clumps better but is also more fine. There's plenty specialty litter mats out there, I just need to get one ordered.