
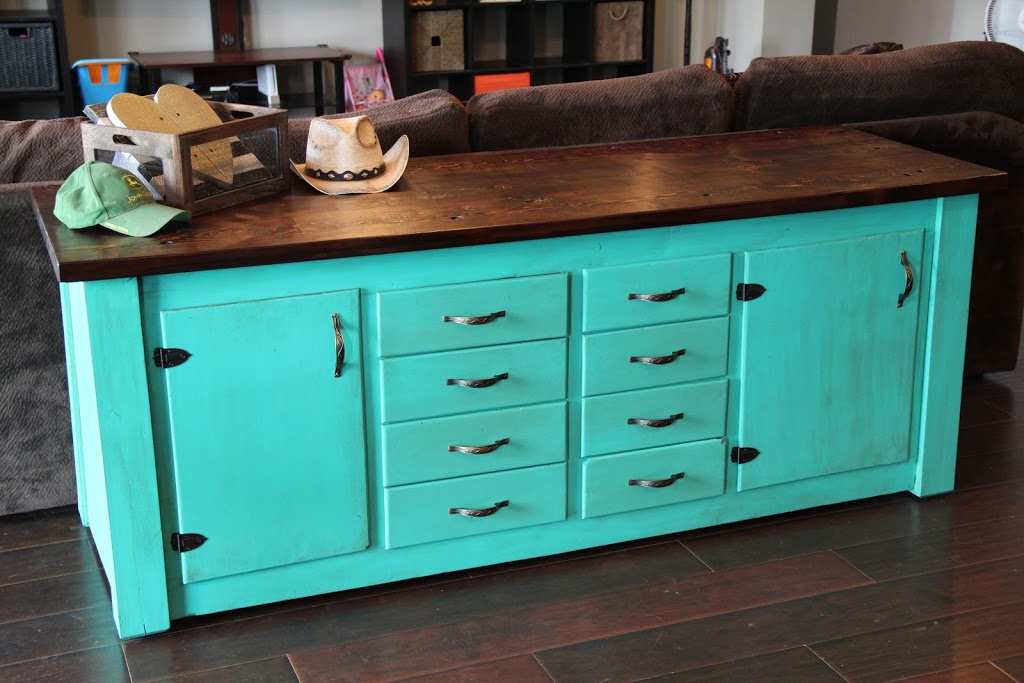
Workbench to Sofa Table

A while back my friend and I acquired this old workbench from a friend going through a divorce. Her X was unable to take any of his tools so somehow the workbench, tools, dirt, grime and all ended up at my house. I actually got so many things that every surface in my garage was covered for nearly two weeks. We finally got time to go through it all, split the good stuff between us and give the rest away. I was planning on putting this old workbench against one of my walls to use for general storage until my mom and wife decided that it needed to come inside and serve a different purpose. Thus my workbench to sofa table renovation started.
(Check out the video here!)
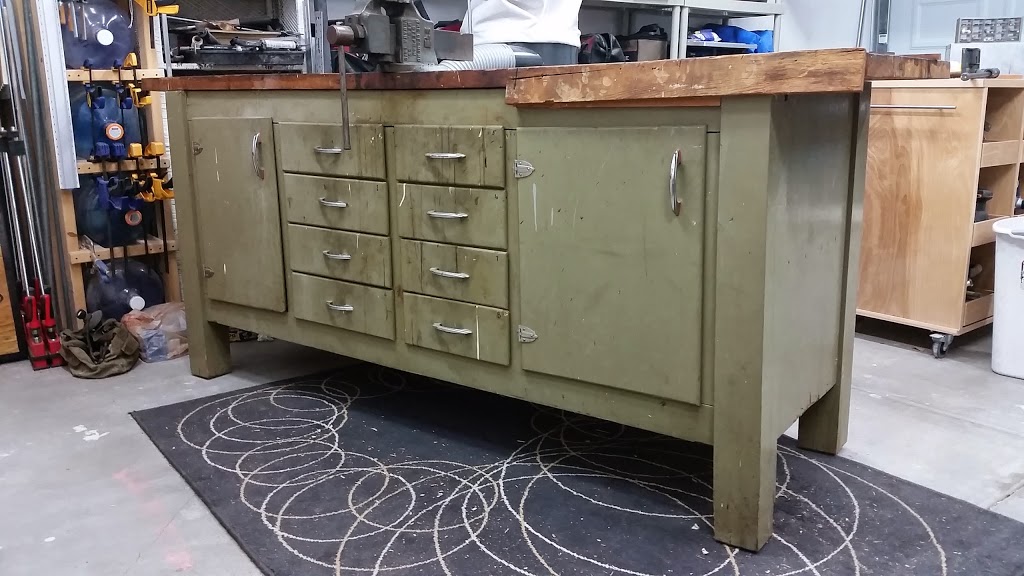
This workbench must have been 30+ years old and was in a fairly sad shape. The top consisted of 3 2x8s and weren't even close to flat anymore. Nearly 6 inches of one leg was demolished from the bottom up and the rest of it wasn't all that square. I wasn't about to fix all of the issues or "charm" so just a basic tune up and re-finishing it was.
[gallery type="rectangular" ids="188,189,190,191"]
I started off by removing the vises and hand planing the top to something that represented flat. There was a lot of years of dirt and grime to remove, so it took a few hours. I actually got my friend Felipe to help out for a bit but after a couple of minutes he gave up and let me back at it.

Both cabinet doors and one of the 8 drawer faces were actually made out of OSB all routed and painted. If some of the paint hadn't worn off I wouldn't have been able to tell they weren't actually solid wood.
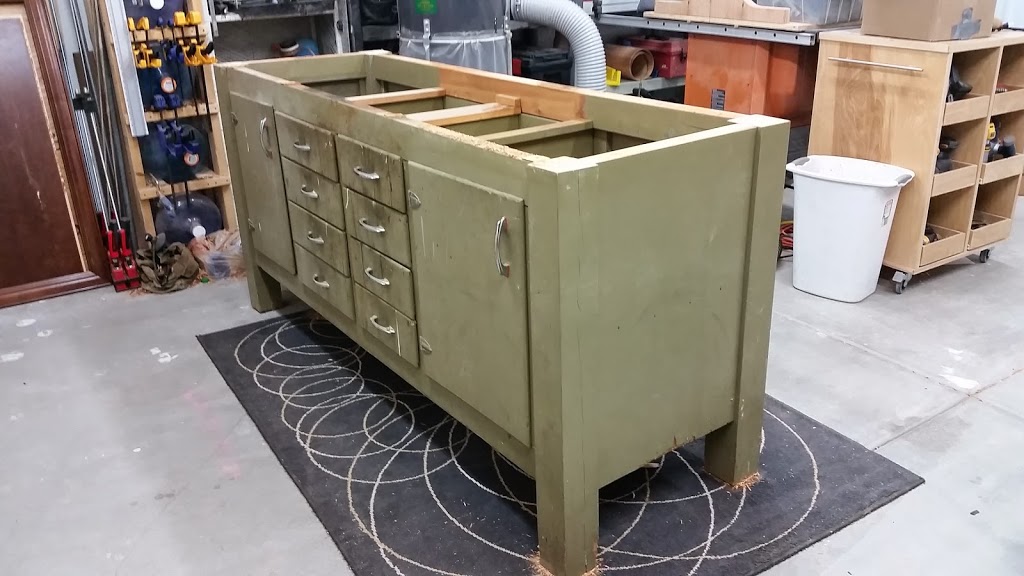
The top was bolted on with 10 bolts with square ends. It took me a while to get the first out until I realized that the 1/2" expansion of my socket set fit the square head perfectly. After chucking it into my large drill the top came off in no time flat.
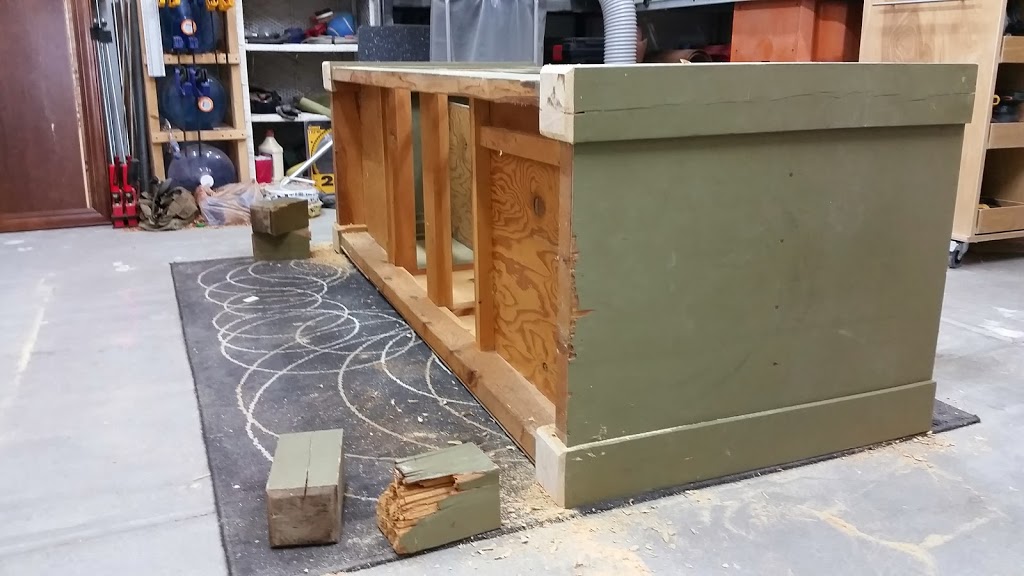
As soon as the top and drawers were removed, this thing was actually fairly easy to maneuver around my shop. Because of the damaged leg and the required height being that of our sofa, each leg got about 8" cut off which left only about an inch below the bottom of the cabinet base. My circular saw only made it part way through the leg but a Japanese hand saw made short work of the rest with great results. Each leg received a chamfer from my block plane which was mostly for decoration since each leg also later received a leveling bolt w/felt foot. (Remember about none of this being square?)
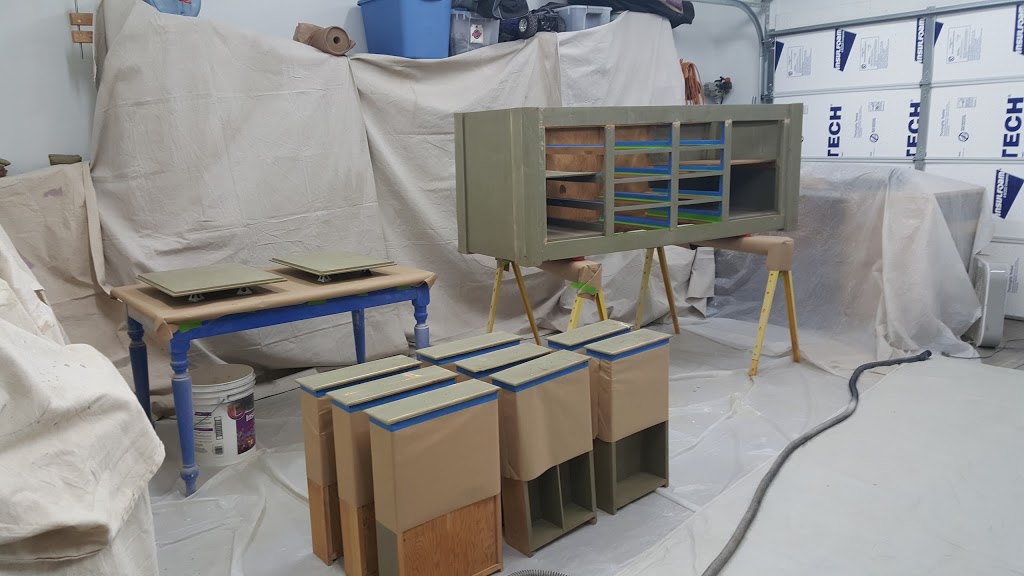

Everything got thoroughly sanded with 220 grit to prepare for a new coat of paint. While sanding I made sure to wear a respirator to prevent breathing in any harmful dust. I'm guessing that this workbench is 30+ years old so there is probably at least some chance of lead paint. I taped off where the drawer's slide to prevent sticking and later waxed the drawer bottoms which made them slide like new.
I covered all tools and shelves on half my garage with drop cloths and got to prepping my HVLP sprayer. I used latex paint which got I thin with a shot glass worth of water to 48oz of paint which makes the paint spray out a lot more evenly. After giving everything a couple of coats, I mixed up some brown glaze and even thinned that down with a decent amount of water due to the 110° temperatures in my garage. After wiping it on and then off I ended up with a nice rustic look that can be seen best on the chair below.
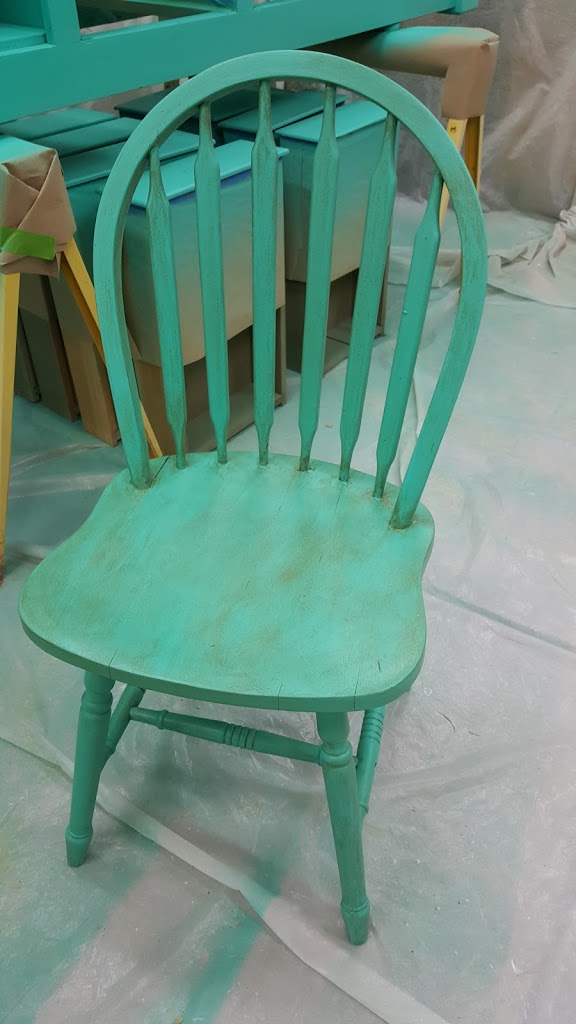
I've gotten into the habit of applying any finish to this chair as a test before applying it to the real project. At this point with half a dozen clear coats and at least a few coats of paint, I'm pretty sure that's the only thing holding this chair together.
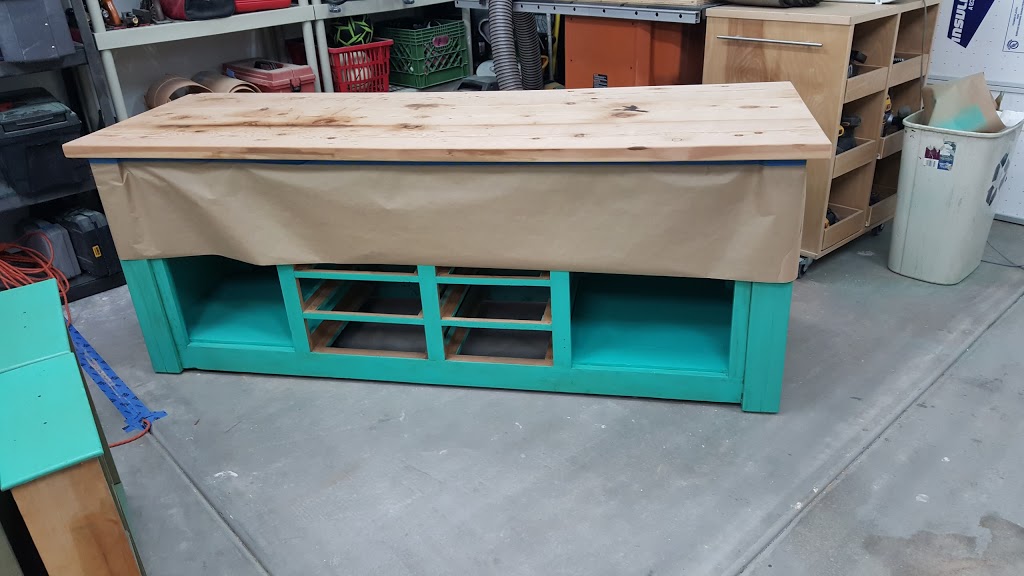

The top originally overhung only in the back so I ended up reversing it. Since nothing lined up I had to drill some new bolt holes in the frame but no harm came from this. I also ended up cutting about 9 inches off each side to bring it down to the 1.5" overhang that I now had on the front.
The whole top received a coat of Dark Walnut stain and then 6 coats of a wipe on poly and mineral spirit finish. I did a 1 part poly and 2 parts mineral spirits to help thin everything out. The first three coats went on fairly lite, primarily to seal everything in and give a little buffer for sanding. The last three coats went on a little heavier using both a rag to spread it around and 600 grit sandpaper to smooth and blend everything together. After you give everything a thorough sanding but before the poly/spirits mixture starts to dry, switch over just to the cloth and buff it until completely dry. This resulted in a nice shiny and super smooth almost soft to the touch finish. I still might add an additional layer of wax but haven't made up my mind yet and now it's inside.
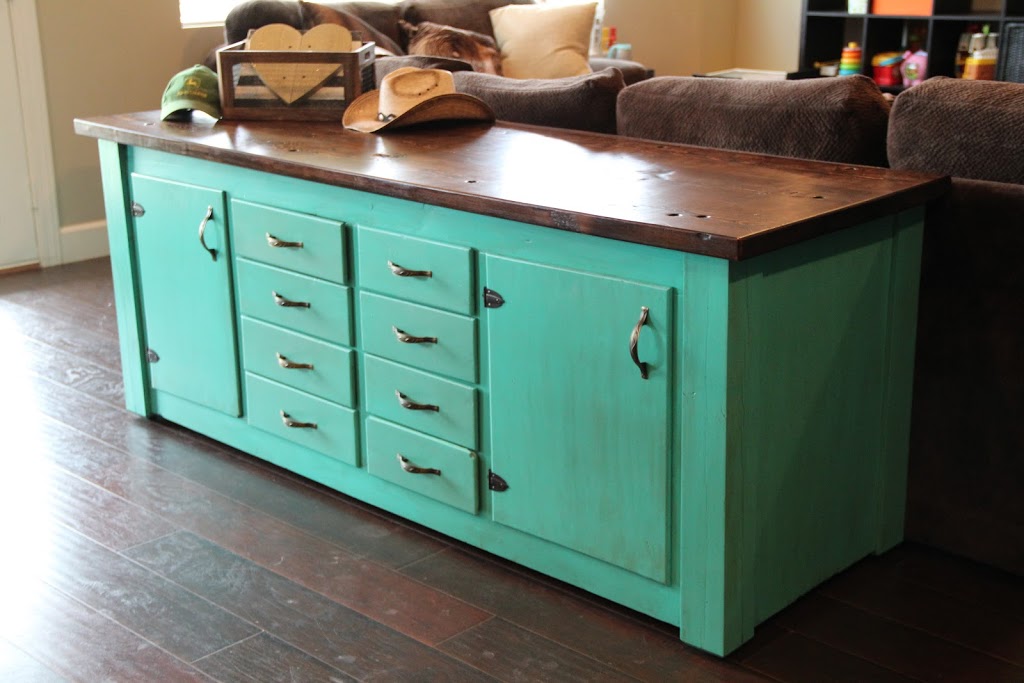
Overall I am very happy how this project turned out and I am also extremely happy that it's done. This took up a very large portion of my garage and basically made doing anything else in there impossible. Pros and Cons of large finishing/renovating projects I guess...
Lessons Learned
- Un-insulated southern facing garages in Chandler Arizona can reach amazing temperatures. When you get home at 5PM and your finishing area is 110°, you better start insulating and installing air conditioning if you every want to apply a finish before 12AM.
- Just because you're primarily spraying in one direction and put drop cloths on top of things behind that direction, it doesn't mean that teal dust won't settle on EVERYTHING else in the area. Behind you, above you, you.. Seriously, everything in my garage had a layer of teal dust.
- Routed doors made out of OSB can turn out surprisingly well but don't hold up.. I bumped the corner of one drawer on the way into the house and had to apply some touch up paint since some of the door chipped off.
- When I get a shop finally built, a dedicated finishing space is a requirement. Covering everything so I can spray is very anti-productive.